
Garageband for Songwriters - Part One
Garageband, whether you like it or not, has ushered in thousands of new songwriters, producers, composers, and all-around musicians. Apple is probably surprised at how predominant it has become for both amateur and professionals. It is incredibly useful and with each new version, becomes more and more intricate. It can be used as a quick recorder to capture ideas on the fly, and a fully realized virtual studio. Below are a handful of ways to start using Garageband to bring your songwriting and recording to greater heights.
*First, we must acknowledge that Garageband is only available for Mac users, though there are similar alternatives for Windows users. The most popular being Cubase (paid) and Audiotool (free).
*Second, once we got writing we realized how much there is to cover on this topic. We will be breaking this post up into 2 parts. The first being about getting set up to record, and the second will cover editing and post-production.
The App
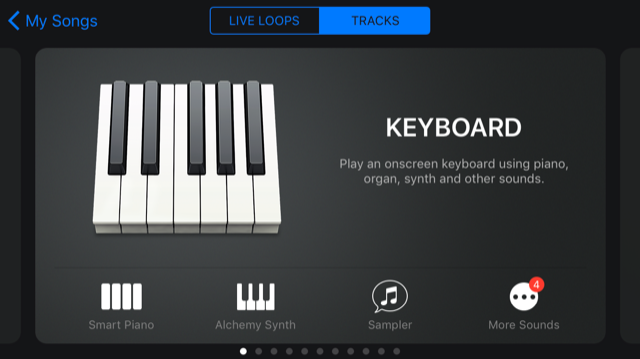
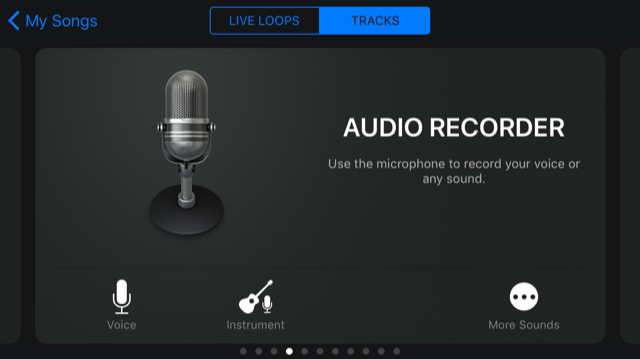
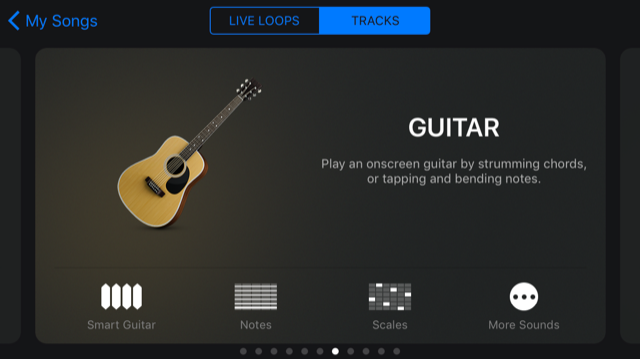
If you use an iPhone, you can download an app version of Garageband for free. This is tremendously useful for recording ideas when you aren’t in front of your computer or instrument. You can hum a melody or rhythm into the vocal recorder, or use one of the many virtual keyboards or drum machines to make your ideas even more realized. This app is actually incredibly detailed, offering dozens of well design virtual keyboards, drums (acoustic and electronic), even guitars and basses. We’ve in-fact used the app to record multi-track demos when killing time on flights and in waiting rooms. Though if you are just beginning your recording endeavors, keep it simple and think of it as a quick and easy recording device. Any tracks you record in the app can easily be transferred to the desktop software, which is wildly convenient.
The Set-Up
Garageband will allow you to record using your built-in computer microphone, but if you are ever planning on releasing your recording to a larger audience, you’ll be disappointed with the sound quality. To get the coveted professional sound, you’ll want to invest in a recording microphone and interface (the device that converts analog sound waves into a digital signal). Thankfully, there are a wide variety of affordable packages that provide professional sound quality. We can personally recommend the Focusrite Scarlett package.
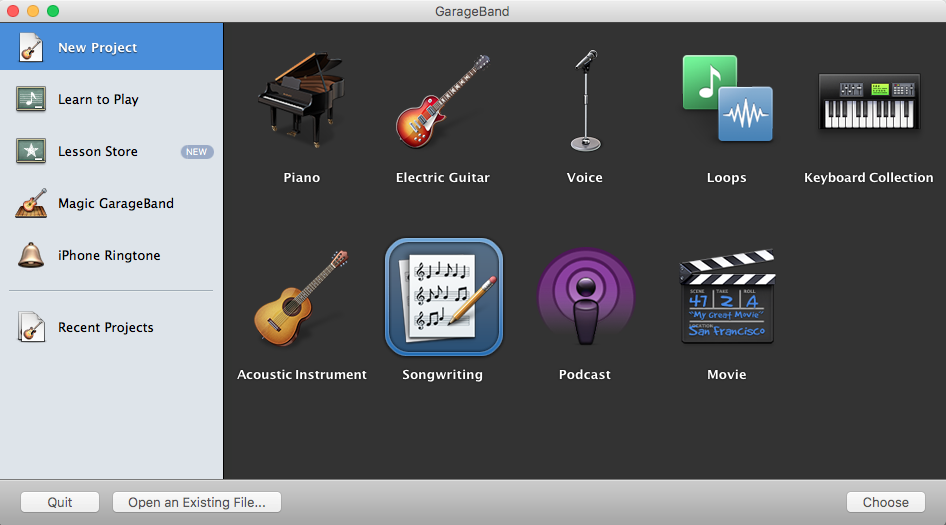
Once you have your microphone set up, and interface plugged in, open up Garageband. Your welcome screen will show a handful of project templates. And look at that, songwriting is one of them!
These projects provide templates with instruments and tracks set up for you. Songwriting offers a track for Voice, Acoustic Guitar, Piano, Muted Bass, and Drums, plugged in at the tempo and time signature set for the song. If you’re just starting out with the software, we recommend deleting all the tracks you know you won’t use right away. Try leaving only the Voice and Acoustic or Piano tracks, depending on your instrument.
Make sure your interface is selected as the audio input under File > Preferences.
When using an interface, you may have to adjust your input volume to make sure your feeding the right amount of volume into Garageband. For the best results, you’ll want to adjust the input on the interface so that the meter on the track just reaches yellow at your loudest volume.
Say you are going to record a song that has both vocals and acoustic guitar; you can approach this in two different ways.
1. You record your vocals and guitar at the same time using the one microphone
Pros: Less tracks makes for an easier to manage the recording and editing process.
Cons: If you add any effects it will effect both instruments.
2. You record your guitar first on one track, and then “overdub” your voice on a second track.
Pros: Seperate tracks can be panned (left or right) independently, and can have effects that are applied to each track
Cons: Timing changes can be a challenge, especially if you are not following a metronome.
Honestly, both are a common practice. It’s up to you to determine what is most comfortable, but if you are looking to get an idea down quickly, we recommend the one mic/one track approach as it is far quicker, especially when you are trying to capture an idea on the fly.
Now that you’re all plugged in, it’s game time.
The Basics
When using the built in microphone, you will only be able to record one track at a time. Simply click on the track you want to record on, and press the red record button on the bottom of the window or just hit the quick key “r”. You should hear the metronome and the track recording in purple.
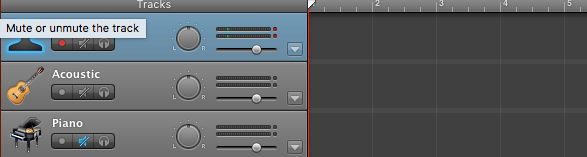
If you have an interface, you’ll be able to record as many tracks simultaneously as you have inputs. So for example, with a two input interface, you can have separate microphones for you vocals and acoustic guitar. Or you can record an electric guitar and bass at the same time. If you have 8 inputs, you can records, vocals, guitar, bass, keyboard, and a drum set with four different mics on it! It does require an additional step though. You will need to Enable Multitrack Recording, under the Track menu. Once that has been selected, you’ll see three small icons next to your track icon. Press on the small circle. Once it is red, that means that track will be recording. On the example below, Voice and Piano will be recording, but not the Acoustic guitar.
Hit the spacebar when you are done recording. You might need to trim the beginning and end to tighten up the track, but we will get into editing in Part 2 soon.
The Instruments
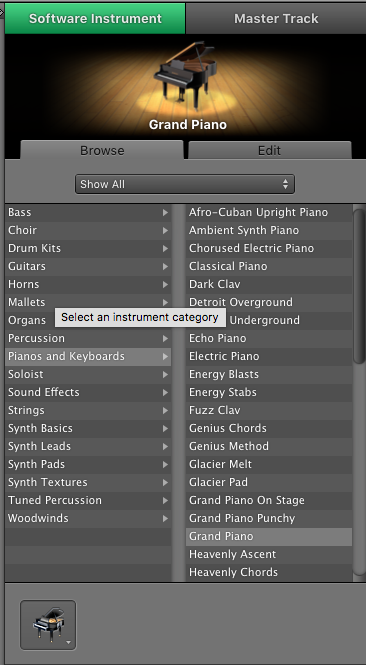
One of the most impressive things about Garageband is it’s variety and quality of built in instruments and effects. There are dozens of guitar and bass amps and effects pedals, vintage and modern keyboards, acoustic and electronic drum sets, as well as orchestra instruments. To add these to your project, click on the “plus” button on the bottom left hand corner of the window. It will pull up three options. Software Instrument, Real Instrument, and Electric Guitar.
Selecting the Software Instrument will populate a Grand Piano, though on the window on the right hand side, you will see everything from Choir sounds to Synthesizers.
When you have a spare hour or six, preview the different sounds. These can all be played on a midi keyboard, USB keyboard, or “musical typing”!
Real Instrument populates a completely blank track. These are meant for tracks that will be recorded from a microphone. Simple enough.
Electric Guitar populates Garagebands amp and pedal simulator. You’ll use your electric guitar or bass, but have the option to play through some classic clean, crunchy, and heavy amps. Double clicking on the amp will open up the tone dials, and clicking edit in the top right will open up classic stomp boxes to choose from. These too can be adjusted to dial in just the right tone.
*Once you find an instrument or amp/pedal combo that you like, save the settings to quickly pull it up in the future. There’s nothing that kills progress on a song like searching through digital instruments and effects trying to find a previous sound.
Well that should get you going. Make some noise, experiment, but always be recording. You’ll never know when you stumble across a real hidden gem. Keep an eye out for Part 2: Editing and Mixing later this week!